My 10 steps to building a pond:
Step #1 Choose a location for your pond
The first step to building your pond is choosing where it should go. Here are a few things you need to consider while choosing the location of your pond: It should be in a spot easily accessible for maintenance. It should be in an area well seen from whatever viewing point you hang out at most. It should be on mostly flat ground, and last but not least, it should be in part-to-half shade.
Step #2 Making the outline of your pond
After choosing the location of your pond, mark the outline and shape of your diy pond with spray paint or a garden hose.
Step #3 Excavate
Now that you have your diy pond shape marked you can begin to excavate your pond. Make sure you dig at least a few caves and shelves for the fish to hide and rest on. Also keep in mind you want your pond to be a minimum of two feet deep in at least one deep pocket. And remember to keep and eye out for pipes!
Step #4 Purchasing your pond supplies
After you have finished excavating your pond, and are sure you are not going to make any tweaks to the hole, you can buy your supplies! You NEED to purchase: a pond liner, a pond underlayment, waterfall foam, rock, a bio falls, and a skimmer or filter canister. To figure out what size pump and underlaytment/liner you need, you will have to calculate your ponds size. The Pond Guy.com has all the pond calculators you’ll need! Some pond ACCESSORIES would include: Pond and landscaping lights, a power head, plants (aquatic and non), and a air stone. I recommend purchasing all your pond needs and wants on The Pond Guy.com, he has great ratings and amazing pricing, and is where I bought all the supplies needed for my diy pond!
Step #5 Pre-underlayment and liner
Before installing your underlayment and liner, you first must clean out your pond. Remove any small rocks and other debris. Any roots sticking out should be snipped flush with the pond walls. If there are any rocks or roots that can not be removed or cut, old towels, rags, blankets, etc. can be layed over the sharp objects to protect the liner and underlayment.
Step #6 Installing underlayment and liner
First place the underlayment in your hole. Press it down into every cave and shelf you made in the excavation, that way your liner will sit without as many wrinkles in it. Then do the same with the liner over the underlayment. Warning: The pond liner can be extremely heavy depending on how big of a liner you need. You probably want to recruit some friends for installing the liner!
Step #7 Rock work
Place whatever type of rock you are using in the pond where you want which piece to go. Next, using pond foam, foam the rocks to the pond liner, and the rocks together. Use 1/3 of the foam you need to fill a gap, crack, or space in between a rock, because the foam will expand, a lot! (If you want to install pond lights, leave a few gaps in between the rocks where you want your lights to go without foam, so later you can wedge them in!). Right after spraying the foam on the rocks, put whichever types of gravel you are using on the foam, that way, when it dries, you will not see as much of the foam. Let the foam dry for as long as it says on the can. After the foam dries, if you want to install pond lights, now is the time! Wedge the lights in the cracks you left. Hide the wires under gravel or behind rocks.
Step #8 Building the water fall and installing the pumps
Now you can build your waterfall. Building the waterfall has it’s own steps, and some of you might not want to build a water fall, so I am going to link to my favorite video on how to build a water fall. If you want to build a water fall, click HERE. Now onto installing the pumps and filter device. Now once more, like the waterfall, it is easier to show you this step in a video. So if you are installing a skimmer as your filter device, click HERE. If you are installing a filter canister, like I did in my pond, click HERE.
Step #9 Cleaning the rock, then filling your pond
Your pond is almost done, but first, before filling it, you have to clean the rock. Now, spray down all the rock and gravel in your pond very well. Next, using a drain pump, drain all the murky water out. Repeat this step a few times, until you notice the water is clearer. Once the water is mostly clear, fill up your pond! Don’t turn on the pumps until the water is at your desired water level, and you are done filling it!
Step #10 Landscaping and touch-ups
Your diy pond is technically up and running, but to make it look like your dream pond, you need to add some flair! You can put any plants you like around it, but I recommend putting a few Lemon Grass around it, because they look cool, and they keep snakes away! (A fake owl will help to!) You can put live plants in, and I would put some lily pads for sure, because they give your fish shade, they add that natural flair, and they help make it harder for Blue Harrons to attack! After you add your (optional) plants, both land and aquatic, landscaping lights, and fake owl, your pond is finished!
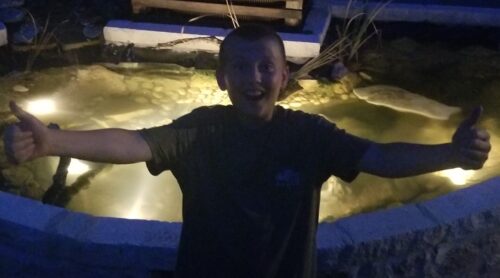
Now you have your dream pond! And although it is a lot of work, when your done, you can enjoy your beautiful water garden!
Thanks for reading this blog, and if you want to watch my diy pond videos, click HERE!
See you next time on Hudson’s Fishing Adventures! Bye!
Hudson’s Best Practice for a DIY Pond!